Pen Assembly Press

Inventing does not mean that you wake up in the morning and say to yourself, “I think I will invent something really new and useful today.  Something everyone will want. And best of all, I will sell it and instantly become a millionaire — or maybe even a multi-millionaire.” Good  luck!

Usually ideas come to you while using a tool, a process, or a machine, which, for the moment, does not work in the way you would like. Or in  the case of this pen press, I needed it right away and did not want to purchase another device that had only one specific function. This pen  press can be adapted to your lathe and is a quick, low-cost solution. After making the first one, I really liked the function of a screw action  press over the more popular lever action devices. I find the screw action provides a smoother, more controlled, pressing pressure. Adjustment  for different size pen parts is quick (and easy as well). By just moving the tailstock in or out, many different size pieces can be pressed together in a matter of minutes.

Click below to download the full article in PDF format:
Pen Assembly Press

Pen Assembly Press Improvement

In Issue #15 (Fall 2007) of Woodturning Design, I described how to make a simple wooden pen press. The press was easy to make, could be  adjusted quickly to accommodate different sizes of pens, delivered a controlled positive pressure, and cost almost nothing to make. Most of  all, it uses the equipment available and doesn’t require purchasing another $40.00 gadget.

I usually make a small production run of at least twenty pens at a time. Unfortunately, the small tip (ink end) digs into the surface when  pressing the brass tip into the bottom section of the turned wooden pen blank with the press. This is good and bad. It is easy on the small  brass tip, but after pressing in a few dozen tips, the pressing face often needs to be resurfaced. This is easy enough to do, and if you use the  pressing surface in the headstock of the lathe, all you need to do is move the tool rest into position, plug in the lathe, and resurface the end  with a small gouge. One small improvement, however, eliminates this problem and makes the device work better.

Click below to download the full article in PDF format:
Pen Assembly Press Improvement

Lighthouse Pepper Mill

Lighthouse

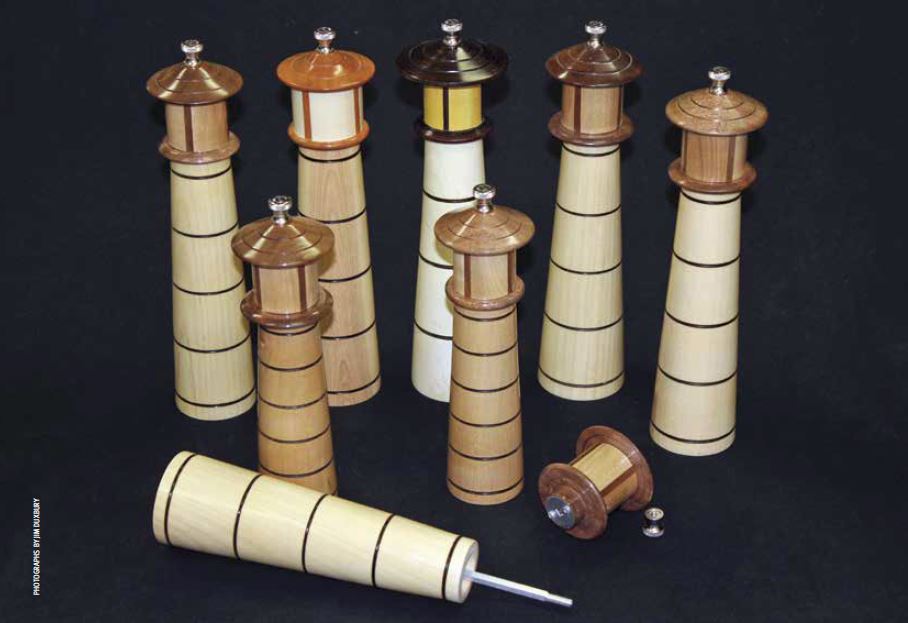
A uniquely designed wooden pepper mill is always a favourite both to turn and to use. Pepper mills can be made in a basic form from a solid  piece of wood or complex wood glue-ups of contrasting colours. In some cases, forms such as a mushroom, the Seattle Space Needle, or even some of the historic lighthouses of England and others around the world would be of interest. All of these wooden mills can be attractively  turned and are only limited by your own imagination. I have made numerous pepper mills of various shapes and sizes; however, the most  popular is the lighthouse design.

Click below to download the full article in PDF format:

Lighthouse Pepper Mill


Tool Handles

ToolHandles

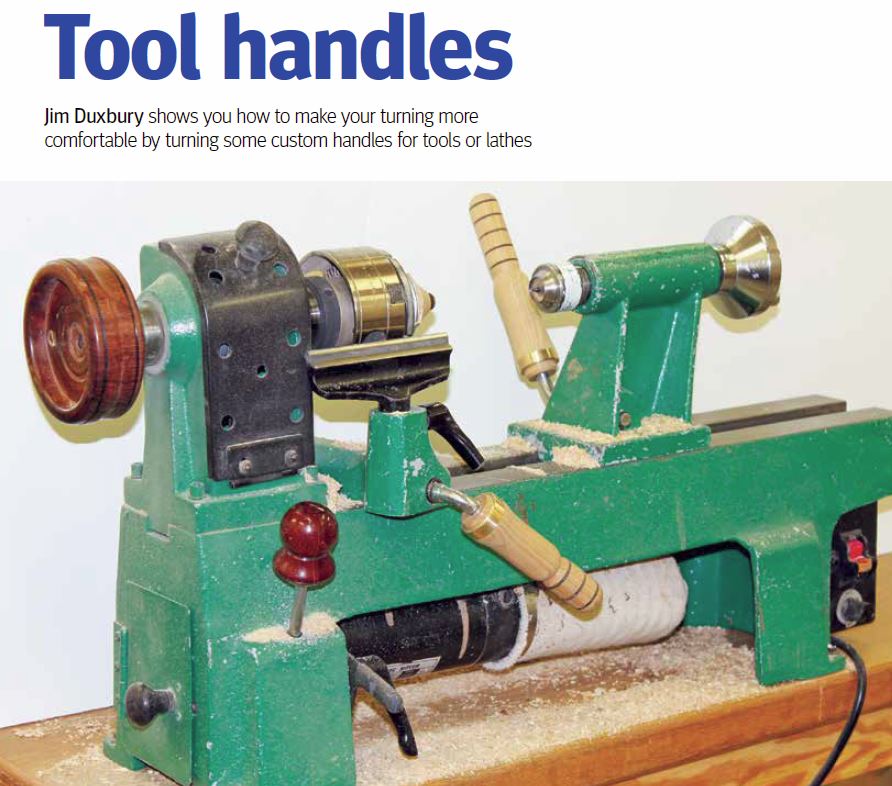
The mini lathes in my workshop are real workhorses; I use them at least 80% of the time. Small projects often require many different   operations that necessitate changing drive centres, chucks, tailstock centres and wooden blanks frequently. Anyone who has worked on a mini lathe for an extended period of time will know what it is like to tighten the tailstock and banjo repeatedly. Pressing on those little, short and thin steel handles can actually hurt your hands after a while. Many turners use small mallets and extension bars to add pressure when needed. For me, that means another operation, another thing to pick up and they are not very convenient to use.

My solution was to turn a wooden  handle for each of these levers. This adds length for more leverage and diameter for a more comfortable grip. That super smooth, well-waxed wood feeling in your hands gives a warm sense of satisfaction every time you use a handle. It makes you want to turn something really first class.

Click below to download the full article in PDF format:

Tool Handles

Color-Coded Chuck Templates

Chucks are a basic accessory that woodturners quickly realize they could never live without. The modern chuck is simple to use and offers a  quick, strong, positive grip for most turning projects, and makes turning a real joy. The chuck was originally a metalworker’s tool, and for  years and years before the chuck was in widespread use by turners, jamb chucking, glue blocks, faceplates, and all sorts of other ingenious  devices were used. There are still times and places where those options do a fine job, especially in repetitive production-type woodturning.  Most woodturners, however, do not usually hold the same shaped object twice and really enjoy the flexibility of a chuck. In fact, they soon  discover that it is a whole new world of woodturning when they get their first chuck.

Modern, 4-jawed, self-centering chucks have screwon, removable jaws, and each set of jaws is designed to hold a specific range of diameters. Most serious turners, over a period of time, acquire a  number of different-size jaws for their chuck. In fact, many turners have several different chucks which are often different brands, each with jaws that are not interchangeable. It can get quite confusing.

Click below to download the full article in PDF format:

Color Coded Chuck Temps